A Guide to Creating Traditional Cheongsam:Step-by-Step Tutorial
Introduction:

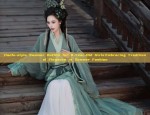
The cheongsam, a traditional Chinese garment, is a symbol of elegance and grace. Its intricate design and craftsmanship showcases the beauty of classic Chinese culture. If you are interested in learning how to make a cheongsam, this tutorial will guide you through the process. From selecting the right materials to finalizing the design, we will cover every Step in detail.
Step 1: Material Selection
The first step in making a cheongsam is selecting the right materials. Cheongsam is usually made from silk, cotton, or synthetic fabrics. Choose a fabric that is smooth and comfortable to wear. Consider the color, pattern, and quality of the fabric before making a purchase.
Step 2: Pattern Drafting
The next step is to draft the pattern for your cheongsam. You can either create your own pattern or use a pre-made one. If you are creating your own pattern, consider the measurements of your body and ensure that the pattern fits well. Draw the pattern on paper or use a computer-aided design software for precise measurements.
Step 3: Cutting the Fabric
After drafting the pattern, it's time to cut the fabric. Use a sharp blade or scissors to cut out the pieces according to the pattern. Ensure that the cuts are precise and accurate to ensure a perfect fit later on.
Step 4: Sewing the Fabric Pieces Together
Now it's time to start sewing the fabric pieces together. Use a sewing machine or hand-stitch the pieces according to the pattern. Start with the main body of the cheongsam and work towards the sleeves and other details. Take care while sewing to ensure that all seams are straight and even.
Step 5: Adding Details
Once the basic structure of the cheongsam is ready, it's time to add details like buttons, trims, and embellishments. These details make the cheongsam unique and add to its elegance. Choose a design that matches your taste and style preferences. Add beads, sequins, or embroidery to enhance the look of your cheongsam.
Step 6: Fitting and Adjustments
After adding all the details, it's essential to try on the cheongsam and make necessary adjustments. Check for any loose or tight areas and make necessary changes. Ensure that the cheongsam fits well and is comfortable to wear.
Step 7: Finalizing the Cheongsam
Once you are satisfied with the fit and look of your cheongsam, it's time to finalize it. Check for any loose threads or seams and make sure that all details are in place. Iron the cheongsam to remove any wrinkles or creases. Your cheongsam is now ready to wear!
Conclusion:
Making a cheongsam is a time-consuming process, but it is rewarding when you see the final product. With this tutorial, you have learned the basic steps involved in making a cheongsam. From material selection to finalizing the design, each step is crucial for achieving a perfect cheongsam. Practice makes perfect, so don't be disappointed if your first attempt doesn't meet your expectations. With practice, you will be able to create beautiful cheongsam that showcases your creativity and craftsmanship.

 Previous Post